

Quick start#
The shortest path from raw ACCESS output to CMORised NetCDF files on NCI Gadi.
Every ACCESS-MOPPy production run is the same four steps, whatever project you are CMORising for:
1. load the analysis3 environment
2. write a batch config file        (which variables + where the data is)
3. moppy-cmorise my_config.yml      (submits one PBS job per variable)
4. moppy-tui --db .../cmor_tasks.db (watch it run)
This page walks through those four steps with the smallest config that actually works. Once it makes sense, go to the page for your project — each one gives you the metadata block to paste in:
Watch it first (10 minutes)#
CMORising ACCESS output for CMIP7 FastTrack — a quick start with ACCESS-MOPPy walks through this page end to end, from loading the environment to watching the batch run.
Note
The narration voice in the video is synthetic and the script was drafted with AI assistance from this documentation. The workflow it shows is the real, maintained one.
Before you start#
You need:
an NCI account, with membership of
xp65(the module) and of the project that owns the model archive you want to read (oftenp73)a scratch directory you can write to
the path to the run you want to CMORise — normally a payu archive root on
/g/data
Step 1 — Load the environment#
module use /g/data/xp65/public/modules
module load conda/analysis3
That gives you moppy-cmorise, moppy-tui, and the rest of the
command-line tools. Check it worked:
moppy-example-config # prints a fully commented example config
Note
The first time the default personal publication profile writes output,
ACCESS-MOPPy asks for your name, email, organisation, and ORCID, and stores
them in ~/.moppy/user.yml. Answer the prompts once on a login node before
submitting a personal-profile batch. Official ACCESS Consortium publication
uses publication_profile: access-consortium and does not request these
details.
Step 2 — Write a batch config#
A batch config is a YAML file that says what to CMORise, where the input is, and what PBS resources each job gets. This is a complete, working minimal example — one variable, ACCESS-ESM1-6, CMIP7:
# my_first_run.yml

# 1. What to CMORise — one PBS job is submitted per entry.
variables:
  - atmos.tas.tavg-h2m-hxy-u.mon.glb

# 2. Who the data belongs to (goes into the file metadata and filenames).
cmip_version: CMIP7
experiment_id: historical
source_id: ACCESS-ESM1-6
variant_label: r1i1p1f1
activity_id: CMIP

# 3. Where the raw model output is, and where output should go.
#    Point input_folder at the archive ROOT — MOPPy finds the files itself.
input_folder: "/g/data/<project>/archive/CMIP7/ACCESS-ESM1-6/historical/<run>"
output_folder: "/scratch/<project>/<user>/moppy_output/first_run"

# 4. PBS resources for each job, and how to set up its environment.
queue: "normalbw"
cpus_per_node: 12
mem: "64GB"
walltime: "04:00:00"
scheduler_options: "#PBS -P <project>"
storage: "gdata/p73+gdata/xp65+scratch/<project>"

worker_init: |
  module use /g/data/xp65/public/modules
  module load conda/analysis3
That is the whole structure. Everything else in the configuration reference is optional tuning on top of these four blocks.
Two things worth knowing straight away:
You do not list input files. Set input_folder to the archive root and
MOPPy uses the model’s built-in file-discovery rules to find the right native
files for each variable. Only reach for file_patterns if your run has an
unusual layout.
Start small. Run one to five variables first and check the output before you submit a list of two hundred. Failures are much easier to read when there are three jobs than when there are three hundred.
To restrict a long run to a few years while you are testing:
start_year: 1850
end_year: 1850
Step 3 — Run it#
From a Gadi login node:
moppy-cmorise my_first_run.yml
The command records every variable in a tracker database, submits a single PBS monitor job, and exits. The monitor job then submits one worker job per variable and retries any that fail.
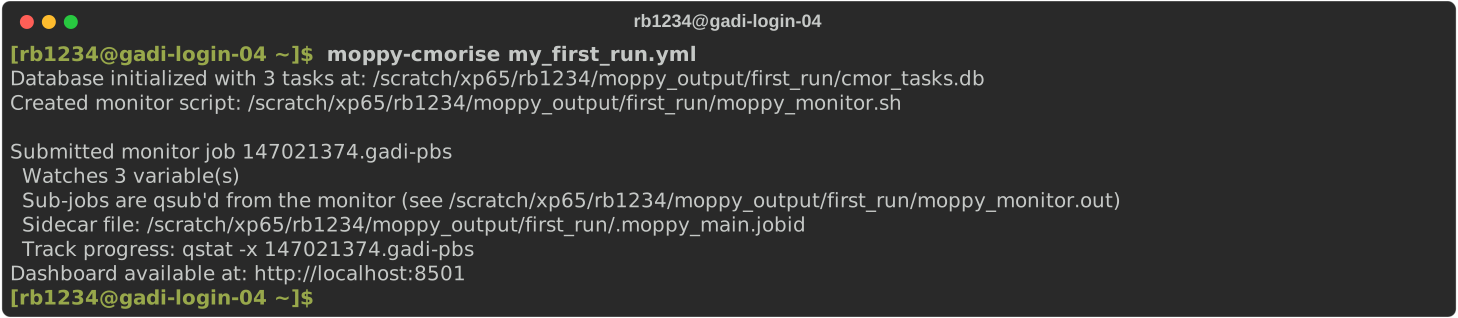
Submitting a batch. The example config behind this screenshot lists three variables, hence three tasks; the paths, user name and PBS job ID are examples too, and yours will differ.#
Because the monitor — not your shell — owns the batch, you can log out straight away. A dropped SSH connection will not stop the run.
Step 4 — Check the status#
The tracker database is written to <output_folder>/cmor_tasks.db. Point the
terminal dashboard at it:
moppy-tui --db /scratch/<project>/<user>/moppy_output/first_run/cmor_tasks.db
It refreshes live and shows each variable as pending, running,
completed, or failed, with error messages for the failures.
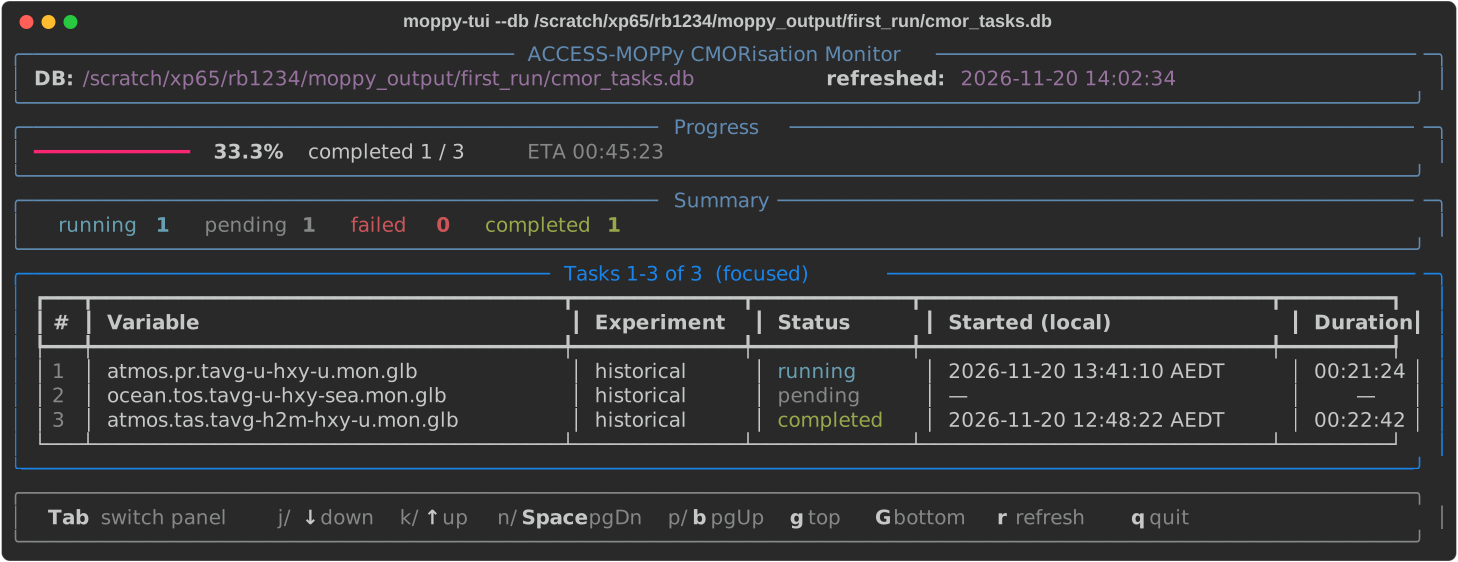
The same three-variable batch a few minutes in: one variable done, one running, one still queued.#
The batch is finished when the progress bar reaches 100% and nothing is left
running or pending:
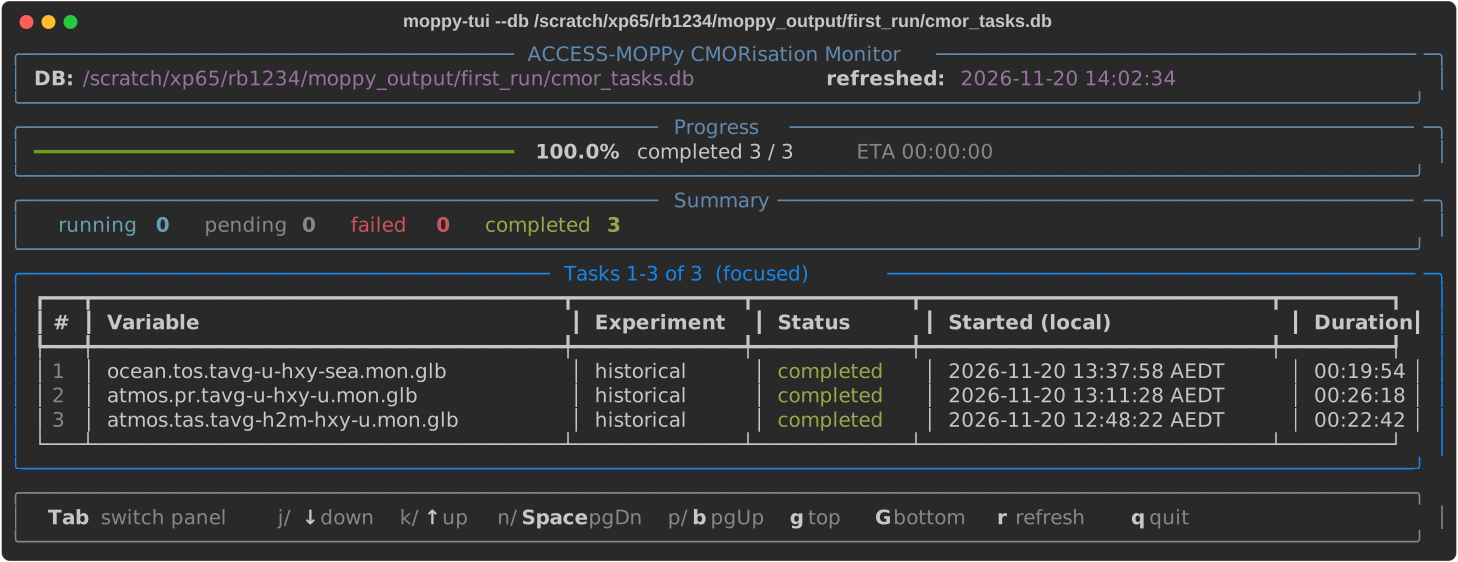
All three variables CMORised. Press q to quit the dashboard.#
Useful variations:
# Only show what went wrong, or what is still going
moppy-tui --status failed,running --db <output_folder>/cmor_tasks.db

# One snapshot and exit — good for a quick check or a cron job
moppy-tui --once --db <output_folder>/cmor_tasks.db

# Full JSON report of the batch, including PBS logs for failed tasks
moppy-batch-report --db <output_folder>/cmor_tasks.db
Step 5 — Look at the output#
CMORised NetCDF files are written under output_folder. Per-variable PBS
logs (.out and .err) land in <output_folder>/logs/<variable>/, which
is the first place to look when a job fails.
To check a file against the CMIP7 output QC rules:
moppy-qc /path/to/output.nc
Where to go next#
I am working on… |
Go to |
|---|---|
CMIP7 FastTrack (ACCESS-ESM1-6) |
|
CMIP6Plus |
|
TIPMIP |
And when you outgrow the quick start:
Configuration reference — every configuration key
Batch Processing Guide — resource tuning, error recovery, monitoring
Getting Started — the Python API, for one variable at a time
Troubleshooting and FAQ — when something goes wrong